Key handover with no meeting required: you leave your property’s key at a KeyNest point and, as soon as each guest completes registration, they receive a collection code valid only during their stay, along with the point’s address and opening hours. Read the general smart lock guide first.
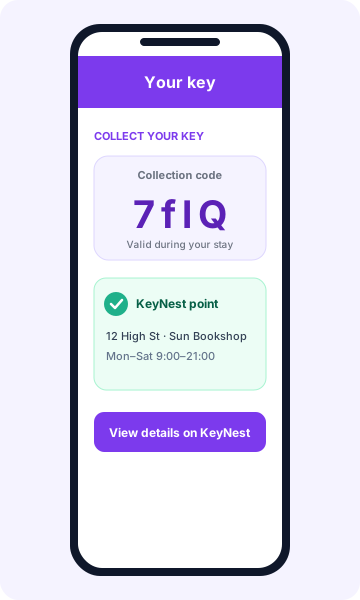
What the guest receives
In their access guide, the guest sees:
- The collection code, unique to their stay.
- The KeyNest point where to collect the key: name, address and opening hours.
- A KeyNest link with the collection details.
The code is only shown once registration is complete and within the access window; never before.
Benefits
- A different code for each stay, which stops working afterwards.
- No copying or forwarding codes by hand: it is generated and sent automatically.
- Courtesy hours before and after the stay, set as you like.
- If the dates change or the booking is cancelled, the code is updated or removed automatically.
Before you start
- A KeyNest account with each property’s key registered and left at a KeyNest point.
- A property created in Registro Parte Viajeros.
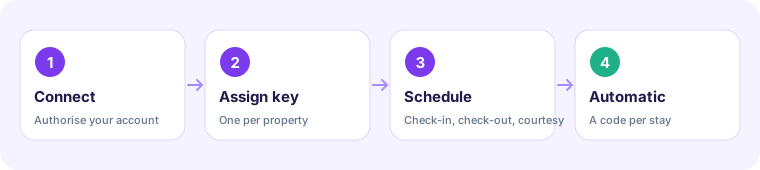
1. Connect your KeyNest account
- Go to Integrations → Locks and click Add lock.
- Choose KeyNest and click Connect with KeyNest.
- KeyNest’s official page opens: authorise access. You never share your password with us.
- When finished, you return to the platform automatically.
If you have more than one KeyNest account, you can connect another with Connect another KeyNest account and choose which one to use at each step.
2. Assign the key to each property
The platform lists your account’s keys with their KeyNest point. For each one, choose the property it belongs to. Keys without a property will not be linked.
One property, one key. Each property is linked to a single key, the one the guest collects. Choosing another replaces the current one.
Keep in mind:
- Quadient lockers do not support automatic collection codes and appear disabled.
- If a key has no name in KeyNest, a warning appears: check that it is the right one for that property before linking it.
- If no keys appear, register the key in KeyNest, leave it at a KeyNest point and click Retry.
3. Set the schedule
| Setting | What it does |
|---|---|
| Check-in time | When the stay starts |
| Check-out time | When the stay ends |
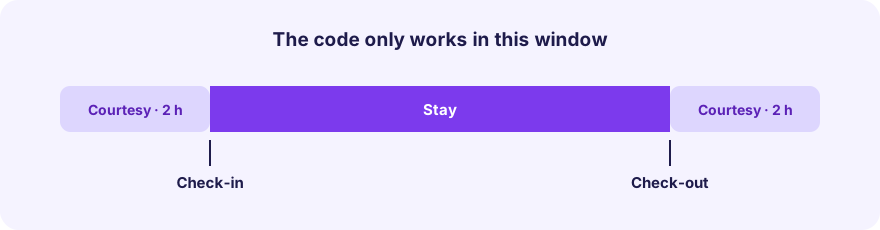
| Courtesy before check-in | Hours before when the code already works |
| Courtesy after check-out | Hours after when the code still works |
The screen shows an example with the actual times at which the guest can collect the key. Finish with Finish and link keys.
4. Choose when the guide is sent
You can send it 15 minutes after the guest completes registration, 24 h before check-in, 48 h before or on check-in day. It is never sent before registration is complete. Write your instructions in your language and they are translated automatically: see the guest access guide.
Everything automatic, nothing for you to do
- Each new booking has its code ready for the stay dates.
- Date changes and cancellations are reflected automatically.
- The guest only sees the code when it is ready and within their window.
Common problems
- The guest can’t see the code: check that every guest’s registration is complete and that their access window has started.
- Expired authorisation notice: click Reconnect KeyNest and authorise again; without it, no new codes are generated.
- I can’t see my key: confirm it is registered in the connected KeyNest account and left at a KeyNest point.
- Connection error: click Connect with KeyNest again; if the authorisation was cancelled or the session expired, repeat the step.
- Unlinking: the key stays in your KeyNest account; it is only detached from the property.
KeyNest is a third-party service: by connecting it you authorise the exchange of the necessary data with that provider, and its availability and terms depend on them.